 By Lauren Holland
Building do it yourself gift baskets for Christmas is one of the most rewarding ways to give a thoughtful present without starting from scratch. In this guide, you will learn how to pick a theme, choose a container, fill it with items that work together, and finish it so it looks like a gift someone spent real time on. The whole process is manageable for a beginner, and it scales from a single gift for a coworker to a full set for a large family.
Why Build Your Own Instead of Buying One?
A store-bought basket can look nice on a shelf, but it is built around what the retailer wants to sell. When you build your own, every item is chosen for the person receiving it. You can match their favorite snacks, a hobby they mention often, or a scent they already like. You also control the overall feel, whether that is cozy, playful, elegant, or practical.
Homemade baskets also let you adjust to your schedule and your list. You can build a dozen small baskets for a team in an evening, or spend a weekend assembling a few large ones for close family. If you are still deciding on overall gift ideas, the DIY Christmas Gift Ideas: 15 Homemade Gifts People Actually Use article covers stand-alone homemade gifts that pair well with a basket.
Step 1: Pick a Theme Before You Shop
A theme keeps the basket from looking like a random collection of things. Start with the recipient and ask what they already enjoy. A theme works best when every item supports a single idea. Some reliable options include:
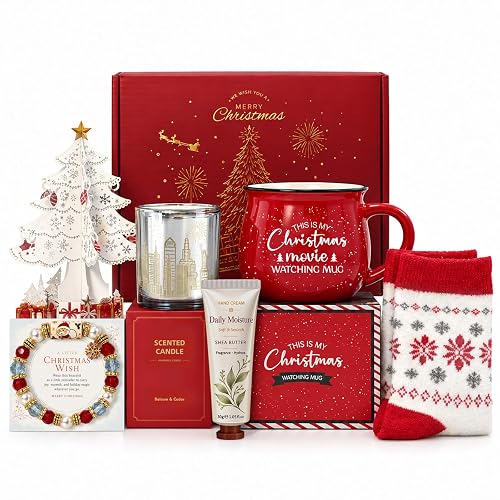
- Hot cocoa and movie night: cocoa mix, marshmallows, a bag of popcorn kernels, and a set of seasonal mugs.
- Pampering and self-care: bath salts, a hand cream, a face mask, and a small candle.
- Baker’s box: a bag of flour, a bar of good chocolate, a small offset spatula, and a recipe card.
- Coffee lover: a bag of whole-bean coffee, a flavored syrup, two mugs, and a biscotti.
- Desk or home office: a notepad, a set of gel pens, a candle, and a small plant.
If you want more theme inspiration, the article Gift Basket Ideas: 12 Themes You Can Buy or Build in 2026 walks through several options with item suggestions for each.
Step 2: Choose the Right Container
The container sets the tone and determines how much you can fit. Common options include:
- Woven baskets with handles, which look rustic and hold heavier items well
- Wooden crates, which feel sturdy and work for food and kitchen themes
- Cardboard gift boxes with lids, which are easy to wrap and ship
- Tins or metal buckets, which work well for cookies, candy, and dry goods
- Reusable tote bags, which add a practical extra the recipient can use after the holidays
Measure before you buy filler. A basket that is 10 inches wide and 6 inches deep holds far less than people expect once you add a jar or a bottle. Lay your main items out on a table, measure their height and width, and then choose a container that leaves about an inch of space around them.
Step 3: Build a Shopping List and Budget Your Items
Write down every item you need before you buy anything. A simple checklist helps you avoid duplicate purchases and last-minute trips to the store.
- List the recipient and theme at the top of the page.
- Choose one anchor item, such as a bottle of wine, a candle, or a bag of coffee. This is the item the rest of the basket supports.
- Add two or three secondary items that fit the theme.
- Include one or two small surprise items, such as a candy bar or a sticker sheet.
- Add filler and finishing materials, such as tissue paper, shredded paper, or cellophane.
- Plan a gift card or handwritten note as an optional final piece.
Shop your own pantry and drawers first. Many people already own serviceable mugs, candles, or cooking tools they can repurpose. Buying in bulk for several baskets can also reduce the overall cost per item, especially for snacks and bath products.
Step 4: Assemble the Basket in Layers
The order in which you place items matters for both looks and stability. A common approach is to build from the bottom up.
Lay Down a Base
Start with a layer of crinkle paper, shredded paper, or a folded dish towel. This cushions heavier items and gives the basket some height. Aim for a base about 2 inches deep so the items do not sink to the bottom.
Place the Heaviest Items Low and Center
Set bottles, jars, and boxed items in the center first. Keep the heaviest pieces low so the basket does not tip. If you are using a tall container, lean a book or a flat box against one side to create a support.
Fill the Gaps With Smaller Items
Tuck snacks, tea bags, cookies in cellophane, and small packets into the open spaces. Angle a few items so the label or packaging faces outward.
Add the Anchor Item at Eye Level
Place your main piece near the front or on top, where it is the first thing the recipient sees when they lift the lid or peek inside.
Finish With Wrap and Ribbon
Cover the top with tissue paper or a clear cellophane wrap, then tie it with ribbon. A simple bow works well. Add a gift tag with the recipient’s name and a short line.
Quick Reference: Tools and Supplies
The table below lists common supplies and what each one is used for.
| Supply | Main Use | Tip |
|---|---|---|
| Crinkle or shredded paper | Base and filler | Use about two handfuls for a medium basket |
| Clear cellophane | Wrapping food and bath items | Gather the top and tie with ribbon for a clean finish |
| Double-sided tape or hot glue | Securing heavy items to the base | Use tape on boxes and glue only on sturdy containers |
| Ribbon, about 1 to 1.5 inches wide | Tying the top and decorating | Cut 24 to 30 inches for a standard bow |
| Gift tags | Labeling recipient and sender | Write the message before you tie the bow |
Recommended gear
A few supplies make the assembly process smoother and the finished basket look more polished.
- Crinkle paper filler: it cushions items and adds color without weight. Choose a neutral or seasonal shade so it matches your theme. View on Amazon
- Clear cellophane gift wrap roll: it lets the recipient see the contents while keeping items sealed and dust-free. View on Amazon
- Double-sided tape for gifts: it holds heavier items steady on the base without visible glue. View on Amazon
Common Mistakes to Avoid
- Overfilling the container. A packed basket can crush fragile items and make the lid hard to close. Leave some breathing room.
- Mixing too many themes. A basket with coffee, bath salts, and a phone case feels scattered. Pick one theme and keep additional items relevant.
- Forgetting dietary needs. Check for allergies and dietary restrictions before adding food. Nuts and gluten are common concerns, so label ingredients when in doubt.
- Placing liquids without sealing them. Bottles can leak. Wrap caps with plastic wrap or a sealed bag before placing them in the basket.
- Building too early. Fresh food, flowers, and baked goods lose quality. Assemble the basket within a few days of giving it, and store perishables in the fridge.
- Skipping a test fit. Lay everything out first. It is much easier to swap an item than to unpack a finished basket.
Tips for a Better Result
- Use odd numbers of items, such as three or five, since groupings of odd numbers tend to look more balanced.
- Vary heights. Tall items in the back and short items in front make the basket easier to read.
- Add a handwritten card. A personal note often matters more than any single item.
- Reuse the basket. Choose a container the recipient can use for storage, picnics, or laundry.
- Keep a small inventory of spare items, such as a candle or a box of tea, for last-minute additions.
For more ideas on combining homemade and store-bought pieces, see 20 Christmas Gift Set Ideas (and How to Build Your Own), which includes several layout examples.
FAQ
How far ahead should I start building do it yourself Christmas gift baskets?
Give yourself at least two weeks. This leaves time to shop for specialty items, test your layout, and adjust if something is out of stock. Assemble perishable items in the final few days.
What is the best container for a beginner?
A medium woven basket or a sturdy cardboard gift box is easiest to work with. Both hold their shape and are forgiving when you are learning how much space each item takes.
How much filler do I need?
For a medium basket, about two handfuls of crinkle paper usually provides enough base and cushioning. Add more if the items are glass or ceramic.
Can I include homemade items in a gift basket?
Yes. Cookies, jams, and bath salts are popular choices. Package them in clean, sealed containers and label them with the ingredients and date.
How do I keep food fresh inside the basket?
Wrap food items individually in cellophane or airtight bags. Avoid placing soft baked goods next to items that release moisture, such as fruit or sauces.
What should I do if the recipient has allergies?
Ask about allergies before you shop, or choose non-food items such as candles, socks, or a book. When you include food, list every ingredient on a tag so the recipient can check it.
Are these baskets suitable for shipping?
Shipping increases the risk of breakage and melting. Use a sturdy box, pack items tightly with filler, avoid glass where possible, and skip perishables for long-distance deliveries.
Should I add a gift receipt?
It is a considerate touch, especially if the basket includes items the recipient may already own or want to exchange. Place it in a small envelope on the top of the basket.
Conclusion
Do it yourself gift baskets for Christmas let you match a present to a specific person in a way that store-bought options rarely do. Start with a clear theme, choose a container that fits your items, and build in layers so the basket is stable and attractive. A little planning, a test layout, and a personal note are usually enough to make a basket that feels genuinely thoughtful.
Related reading
- Popular Christmas Gift Categories and Who Each Suits
- Personalized Christmas Gift Ideas (and When to Order Them)
- Gift Basket Ideas: 12 Themes You Can Buy or Build in 2026
Ready to choose one?
About Lauren Holland
Lauren Holland is part of our editorial team and reviews and edits our christmas gifts by budget & occasion guides, checking product details against manufacturer specifications and owner feedback.