 By Lauren Holland
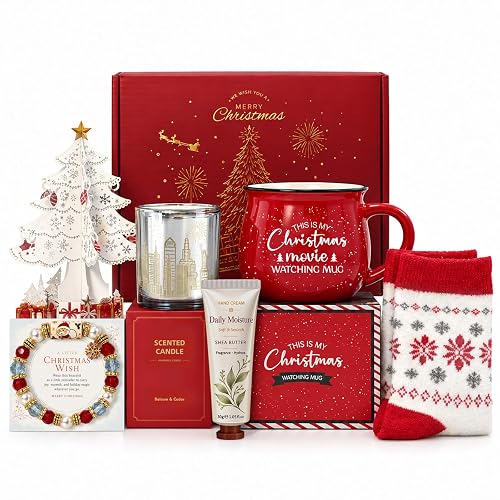
Christmas DIY gift baskets let you put together a thoughtful, personal present without buying a pre-made set. In this guide you will choose a theme, pick a container, fill it in a balanced way, and finish it so it looks like you spent far more time on it than you did. The method works for coworkers, neighbors, teachers, and close family alike.
Why Build Your Own Christmas Gift Baskets
A homemade basket lets you tailor every item to one person. You can skip the things they already own, add an inside joke, or include a handwritten note that no store-bought set would carry. Building your own also gives you control over quality. You decide whether the chocolate is dark or milk, whether the tea is loose-leaf or bagged, and how much packaging ends up in the landfill. If you enjoy DIY projects, you may also like our roundup of DIY Christmas Gift Ideas: 15 Homemade Gifts People Actually Use, which covers gifts you can make from scratch rather than assemble.
Step 1: Choose a Theme Before You Shop
A theme keeps a basket from looking like a random collection of leftovers. Pick one idea and let every item support it. Strong themes include a cozy movie night, a home baker’s kit, a spa evening, a coffee lover’s morning, a hot cocoa station, or a pantry of savory snacks. For inspiration on structure and categories, see Gift Basket Ideas: 12 Themes You Can Buy or Build in 2026.
Before you choose, answer three questions. Who is the recipient? What do they already use or enjoy? How many people will share the basket? A basket for a single person can be personal and specific. A basket for a household should include items everyone can use.
Step 2: Pick the Right Container
The container sets the tone and determines how much you can fit. Common options include:
- Wicker or woven baskets with a handle, good for holding bulky items like mugs and jars
- Shallow wooden crates, which look rustic and suit food-heavy baskets
- Galvanized metal buckets, useful for a winter or farmhouse look
- Gift boxes with lids, ideal for small, delicate items such as jewelry or candles
- Reusable tote bags or fabric bins, which the recipient can keep using after the holidays
As a rule of thumb, choose a container roughly 30 to 40 percent larger than the total volume of your items. This leaves room for crinkle paper or shredded fabric filler, which gives the arrangement a full look without crushing anything.
Step 3: Plan Your Fillers and Main Items
Build a Balanced Mix
A satisfying basket usually has one anchor item, two or three supporting items, and a few small extras. The anchor is the largest or most important piece, such as a mug, a bottle of olive oil, or a candle. Supporting items round out the theme, and small extras such as mini candy canes, individually wrapped cookies, or a tea bag tucked into a corner add surprise.
Use Height and Layers
Place taller items at the back or center and shorter ones in front. Set heavy items on the bottom, then add lighter things on top. Lay one or two flat items, such as a card or a bar of chocolate, against the side of the container so the front view reads clearly.
Step 4: Gather Supplies and Tools
Having everything ready before you start prevents rushed decisions. Here is a checklist to work from:
- Container (basket, crate, box, or tote)
- Filler material such as crinkle paper, tissue paper, or shredded cardstock
- Cellophane or clear wrap, and ribbon in one or two coordinating colors
- Scissors, a tape dispenser, and a hot glue gun if you are attaching decorations
- Gift tags and a pen for a handwritten message
- Your theme items, weighed or measured so they fit the container
Before you buy anything, place a few items in the container to test the fit. Adjust as needed. This small step prevents the most common sizing problem: discovering the lid won’t close.
Step 5: Assemble the Basket
Line the Base
Start with a layer of filler about two to three inches deep. Crumple tissue or crinkle paper gently so it holds its shape. This cushions glass, and it stops items from sliding around.
Arrange From Heavy to Light
Place the heaviest and sturdiest items first, positioned against the back wall of the container. Work toward the front with progressively smaller pieces. Fill any gaps with extra filler so nothing shifts when the basket is lifted.
Secure Loose or Fragile Items
Wrap glass jars or bottles in tissue paper before placing them. For small items that could roll, tuck them into a paper cone or a folded napkin. If the basket will travel, add a layer of filler over the top and keep the lid or cellophane ready to close.
Step 6: Finish and Wrap for Presentation
Wrap the finished basket in clear cellophane, gathering the top and tying it with ribbon. For a more formal look, wrap the entire container in tissue paper and tie a bow at the base. Attach a tag with a short, specific note. Something like “For the best Sunday morning coffee on the block” feels more personal than “Merry Christmas.”
Common Mistakes to Avoid
- Overfilling. A packed basket looks crowded and makes items hard to remove. Leave some negative space.
- Mixing too many themes. A basket that is half coffee and half bath products reads as confused. Stay with one theme.
- Ignoring food safety and expiration dates. Check best-by dates, and avoid perishable items if the basket will sit out for several days.
- Forgetting dietary needs. Look for allergens in baked goods and snacks, and skip nuts unless you know the recipient eats them.
- Skipping the test fit. Assemble once dry, then close the wrap before you commit to glue or ribbon.
- Using loose glitter or confetti. It spreads everywhere and is hard to clean up. Opt for paper filler instead.
Tips for a Polished Result
- Stick to two or three coordinating colors across filler, ribbon, and wrap.
- Buy extra mini items, such as spoons, tags, or tea bags, to fill small gaps.
- Add one reusable element, like a wooden spoon or a cloth napkin, so the basket keeps giving after the holidays.
- Build a few baskets at once using an assembly-line method. Set out identical filler and items for each one.
- If you are working on a tight schedule, see Christmas Gift Ideas for Couples: 20 Gifts to Share for quick pairings that suit a shared basket.
Theme Ideas to Start With
| Theme | Core Items | Best For |
|---|---|---|
| Hot cocoa station | Cocoa mix, marshmallows, peppermint sticks, mug | Families and kids |
| Home spa evening | Bath salts, face mask, candle, washcloth | Friends and busy adults |
| Coffee morning | Ground coffee, flavored syrup, mug, biscotti | Coworkers and neighbors |
| Baker’s kit | Specialty flour, vanilla, sprinkles, wooden spoon | Home cooks |
| Movie night | Popcorn kernels, candy, cozy socks, drink mix | Couples and roommates |
Recommended gear
A few supplies make assembly easier and the finished basket more durable. Look for these types of items:
- Crinkle paper filler, which fluffs up quickly and hides gaps. Choose a color that matches your theme. View on Amazon
- Clear cellophane gift bags or wrap, which show off the contents while protecting them from dust. View on Amazon
- A mini hot glue gun with sticks, useful for attaching bows and decorative picks to the container. View on Amazon
- Wired ribbon in one or two coordinating colors, which holds a bow shape better than plain ribbon. View on Amazon
FAQ
How far ahead should I build Christmas DIY gift baskets?
Most baskets can be assembled one to two weeks before the holiday. Avoid assembling perishable food items too early, and keep baked goods in airtight packaging until you give them.
How much should I spend on each basket?
The budget depends on your goals. A basket built around one anchor item and inexpensive pantry staples can look generous, and many people find that thoughtful choices matter more than the size of the basket.
What is the best filler for a gift basket?
Crinkle paper and shredded tissue are popular because they are light, easy to fluff, and recyclable. Fabric scraps or reusable cloth napkins also work well if you want the filler to be useful.
Can I make a gift basket for someone with dietary restrictions?
Yes. Check labels for allergens such as nuts, dairy, gluten, and soy. Choose non-food themes like bath products or stationery when you are unsure.
How do I keep a basket from looking messy?
Limit yourself to one theme and two or three colors. Place items in rows from back to front, and use filler to create a smooth top layer.
Should I include a gift receipt?
If the basket contains items the recipient might want to exchange, a gift receipt is a practical addition. Place it in a sealed envelope tucked near the top.
How do I ship a homemade gift basket?
Use a sturdy box with extra padding, and avoid liquids and perishable foods unless you pack them securely in leak-proof, insulated packaging. Check shipping carrier rules before you send anything with glass or food.
Are there gifts that suit a basket better than others?
Items that come in several small pieces, such as tea sets, bath products, and snack assortments, work especially well. For more gift category ideas, read Popular Christmas Gift Categories and Who Each Suits.
Conclusion
Christmas DIY gift baskets are simple to build once you settle on a theme, choose a container that fits, and arrange items from heavy to light. Keep the design focused, check dietary needs, and finish with a personal note. A little planning turns a handful of items into a gift that feels made just for the person receiving it.
Related reading
- DIY Christmas Gift Ideas: 15 Homemade Gifts People Actually Use
- Popular Christmas Gift Categories and Who Each Suits
- Personalized Christmas Gift Ideas (and When to Order Them)
- Gift Basket Ideas: 12 Themes You Can Buy or Build in 2026
- Classic Christmas Gifts People Love Every Year
- Christmas Gift Ideas for Women: 30 Ideas by Interest
Ready to choose one?
About Lauren Holland
Lauren Holland is part of our editorial team and reviews and edits our christmas gifts by budget & occasion guides, checking product details against manufacturer specifications and owner feedback.